TAIL BOOM, PART 2
[10/01/2006]
I made some good progress in just a few hours on this Sunday afternoon. I'm inching ever closer to my goal of completing the tail by Halloween (though I'm not sure I'll make it).
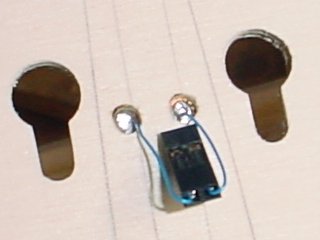 I decided it was possible to implement my original idea of mounting a connector to the horizontal
stabilizer for the power connection to the lights, so I made one and hooked it up.
I decided it was possible to implement my original idea of mounting a connector to the horizontal
stabilizer for the power connection to the lights, so I made one and hooked it up.
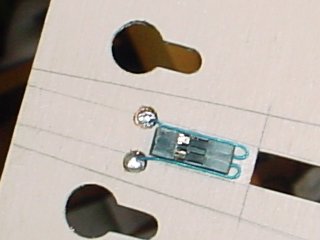 And I glued the connector directly to the stabilizer where it will remain forever (or until it gets broken off).
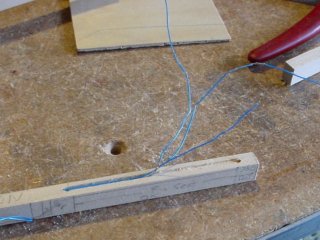 Plans for a revision to the tail end design gave me an opportunity to clean up an earlier mess I made of the wiring
in the boom stick that carries the power lines.
Plans for a revision to the tail end design gave me an opportunity to clean up an earlier mess I made of the wiring
in the boom stick that carries the power lines.
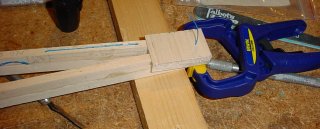
 I got the wiring straightened out and mixed up some epoxy and clamped the sticks together to make
the right-hand boom stick. I mixed the epoxy poorly and it took a long time to set up - will probably
continue hardening over the next few years. I was less than happy about the job, but it will do.
I got the wiring straightened out and mixed up some epoxy and clamped the sticks together to make
the right-hand boom stick. I mixed the epoxy poorly and it took a long time to set up - will probably
continue hardening over the next few years. I was less than happy about the job, but it will do.
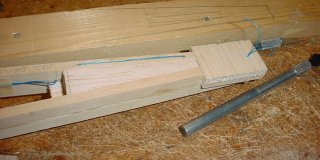
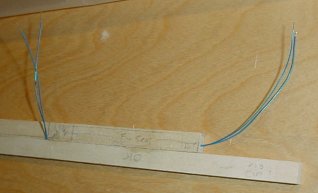 The revised tail end with new wires - no more loose ends, so to speak. Wires protruding from the end
will attach to a connector that will mate with the connector on the horizontal stabilizer. Wires
protruding from the side will become an alternate contact point for power if needed in the future (say,
for an external lighting fixture if the lights in the tail ever fail).
The revised tail end with new wires - no more loose ends, so to speak. Wires protruding from the end
will attach to a connector that will mate with the connector on the horizontal stabilizer. Wires
protruding from the side will become an alternate contact point for power if needed in the future (say,
for an external lighting fixture if the lights in the tail ever fail).
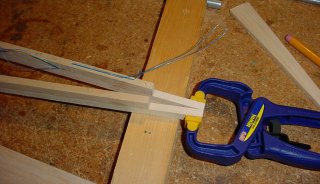
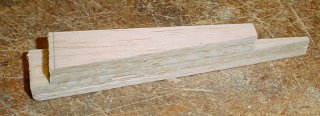
 Laminated the left-hand boom stick together. I wish I had done this one, first, since it would have
been easy to re-do if I botched it, like I almost did with the right-hand one. But I did this one
last, and it came out beautiful.
Laminated the left-hand boom stick together. I wish I had done this one, first, since it would have
been easy to re-do if I botched it, like I almost did with the right-hand one. But I did this one
last, and it came out beautiful.
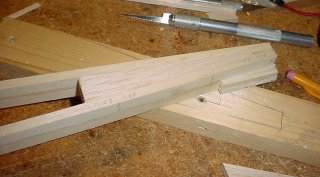
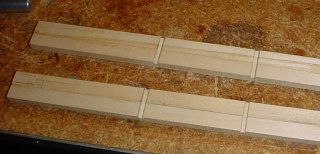 Before connecting the boom sticks together, I created a couple of notches near the fuselage end that
will eventually support a couple of formers that will ensure proper spacing.
Before connecting the boom sticks together, I created a couple of notches near the fuselage end that
will eventually support a couple of formers that will ensure proper spacing.
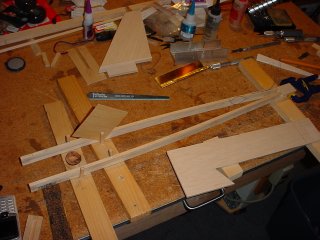 I put the sticks in my jig and prepared to join them. I neglected to build a better jig as I had
considered doing (but didn't add to my check list) and in the end I think I paid a price (the boom is not quite
straight), but it will do.
I put the sticks in my jig and prepared to join them. I neglected to build a better jig as I had
considered doing (but didn't add to my check list) and in the end I think I paid a price (the boom is not quite
straight), but it will do.
 I clamped the tail end together so I could work with it, starting with a little sanding and preparation
for routing the wires.
I clamped the tail end together so I could work with it, starting with a little sanding and preparation
for routing the wires.
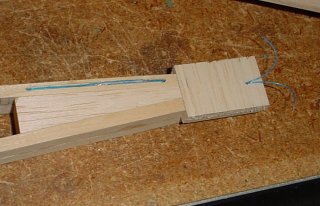
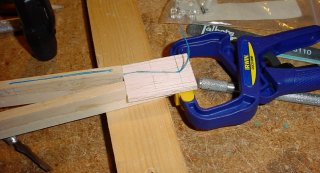 I applied a small block of balsa wood with a groove cut into it for the wires and ran the wires
along the groove.
I applied a small block of balsa wood with a groove cut into it for the wires and ran the wires
along the groove.
 I laminated another small block of balsa wood on top of that, passing the wires through a small hole.
A small connector will mount on top to mate with the small connector in the horizontal stabilizer.
This block will also provide additional surface area needed for attaching the horizontal stabilizer
mounting plate to the boom. After the mounting plate is attached (a future installment), everything
will be sanded to shape (using the good ol' Dremel rotary tool).
I laminated another small block of balsa wood on top of that, passing the wires through a small hole.
A small connector will mount on top to mate with the small connector in the horizontal stabilizer.
This block will also provide additional surface area needed for attaching the horizontal stabilizer
mounting plate to the boom. After the mounting plate is attached (a future installment), everything
will be sanded to shape (using the good ol' Dremel rotary tool).
 I built up a massive filler block, consisting of four layers of balsa wood laminated together.
Much of this material will be removed as you will see in a later installment.
I built up a massive filler block, consisting of four layers of balsa wood laminated together.
Much of this material will be removed as you will see in a later installment.
 The filler block is installed temporarily for a trial fit. Looks pretty good from the top.
 Looks good from the bottom, too. I don't yet have the pictures loaded into the computer after
I glued it in place. It came out nice! The next step is to cut most of it out with the band
saw, leaving a nice 1/4" (approx.) slot for the fin tab to seat. Sounds simple enough, but there's
a pretty complex process involved leading up to that.
Looks good from the bottom, too. I don't yet have the pictures loaded into the computer after
I glued it in place. It came out nice! The next step is to cut most of it out with the band
saw, leaving a nice 1/4" (approx.) slot for the fin tab to seat. Sounds simple enough, but there's
a pretty complex process involved leading up to that.
 I just uploaded the final image - and here it is.
Stay tuned.