FUSELAGE I
[10/14/2006]
Progress was extremely slow today. That is if you measure progress by the amount of construction that was performed. A lot of today's work was mental work, thinking about the design, examining my prototype, considering possibilities and issues. But I did make some construction progress.
 I decided to shift gears and begin construction on the fuselage a bit earlier than
scheduled. I decided this was the best move, since having the entire assembly (fuselage and
tail boom) assembled, I can make the finishing touches on the tail boom more precise.
I decided to shift gears and begin construction on the fuselage a bit earlier than
scheduled. I decided this was the best move, since having the entire assembly (fuselage and
tail boom) assembled, I can make the finishing touches on the tail boom more precise.
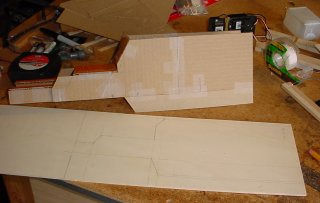
I extended the fuselage sides to accommodate the desired cargo space and drew up the lines
to cut on the plywood sheets they would be constructed from.
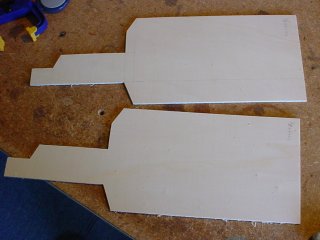 I taped two sheets of plywood together and cut out the left and right fuselage sides on the
band saw at the same time. Their design differs slightly from the cardboard prototype. It is
what it is - hopefully it will work out.
I taped two sheets of plywood together and cut out the left and right fuselage sides on the
band saw at the same time. Their design differs slightly from the cardboard prototype. It is
what it is - hopefully it will work out.
 After cutting out the sides, I realized I could chop off a bit of wood from the front due to
the design change, so I taped the pieces back together and lopped off the stub nose.
After cutting out the sides, I realized I could chop off a bit of wood from the front due to
the design change, so I taped the pieces back together and lopped off the stub nose.
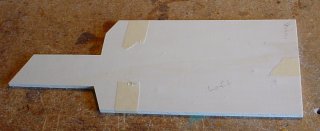
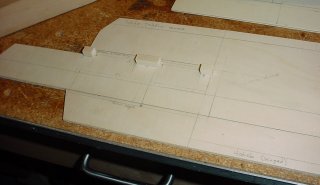 It is hard to explain this one, but I added some small rails to act as supports for a small shelf
that will be installed much later (you'll see). The shelf will carry the batteries and receiver
in the space above where the servos will mount. The bulk of the rear half of the fuselage will
be reserved for carrying cargo.
It is hard to explain this one, but I added some small rails to act as supports for a small shelf
that will be installed much later (you'll see). The shelf will carry the batteries and receiver
in the space above where the servos will mount. The bulk of the rear half of the fuselage will
be reserved for carrying cargo.
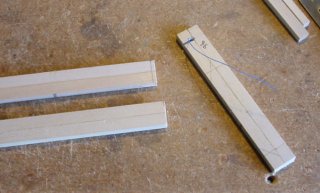 Remember the boom sticks that I built, originally, and scrapped? Well, they've been recycled.
I am chopping them up to become the fuselage sticks. Here you can see one of the ends that I
lopped off.
Remember the boom sticks that I built, originally, and scrapped? Well, they've been recycled.
I am chopping them up to become the fuselage sticks. Here you can see one of the ends that I
lopped off.
 The right-hand stick needs to mate with the corresponding boom stick, so I notched out the end
to accept the male connector, similar to how I did on the boom stick for the female connector.
The right-hand stick needs to mate with the corresponding boom stick, so I notched out the end
to accept the male connector, similar to how I did on the boom stick for the female connector.
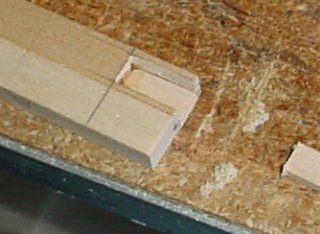 After notching out the stick, I put a backing on one side to form a cradle that would serve to
house the connector.
After notching out the stick, I put a backing on one side to form a cradle that would serve to
house the connector.
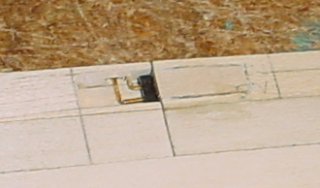
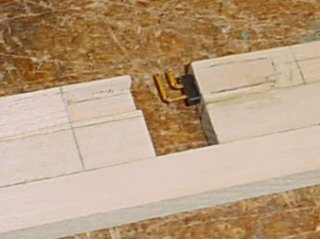 Here, I have mated the connectors together to aid in establishing proper alignment for the new
housing so the connectors will mate properly in the final assembly. I have cut a slot in one
side of the cradle to allow the pins to slide in.
Here, I have mated the connectors together to aid in establishing proper alignment for the new
housing so the connectors will mate properly in the final assembly. I have cut a slot in one
side of the cradle to allow the pins to slide in.
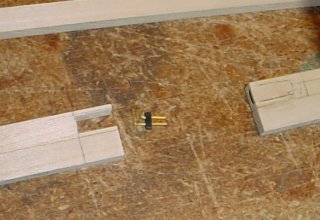
 I brought the fuselage stick and the boom stick together to check alignment and clearances and
to make adjustments.
I brought the fuselage stick and the boom stick together to check alignment and clearances and
to make adjustments.
 Once satisfied, I soldered on a couple of wires and glued the male connector in place within the
cradle. I then began chopping up small pieces of balsa wood to fill in the unused space in the
cradle behind the connector.
Once satisfied, I soldered on a couple of wires and glued the male connector in place within the
cradle. I then began chopping up small pieces of balsa wood to fill in the unused space in the
cradle behind the connector.
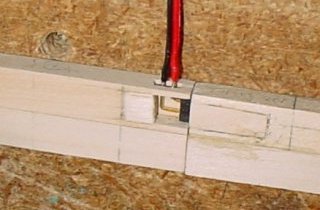
 I then completed the connector housing by gluing in one final piece of balsa wood and sanding it
down flat. It doesn't look smooth in the picture, but it is - it just has a heavy grain in the
wood.
I then completed the connector housing by gluing in one final piece of balsa wood and sanding it
down flat. It doesn't look smooth in the picture, but it is - it just has a heavy grain in the
wood.
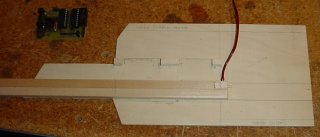 Not the greatest shot, but you can see the stick I have epoxied to the fuselage side. I only got
the right side done - the left side will have to wait for another time. You can see my
RC4 circuit in the photo, which will likely be among the cargo that this
plane will eventually carry.
Not the greatest shot, but you can see the stick I have epoxied to the fuselage side. I only got
the right side done - the left side will have to wait for another time. You can see my
RC4 circuit in the photo, which will likely be among the cargo that this
plane will eventually carry.
The weather keeps changing and the forecast is never right, so I may not go flying again this weekend, so perhaps I will get a chance to do some more work on Questor before next week begins. I hope to get some time in during the week as well. I am anxious to fly this thing, but I know it is going to be a long time, yet, before I get to that point. But every day is one step closer!